 Save
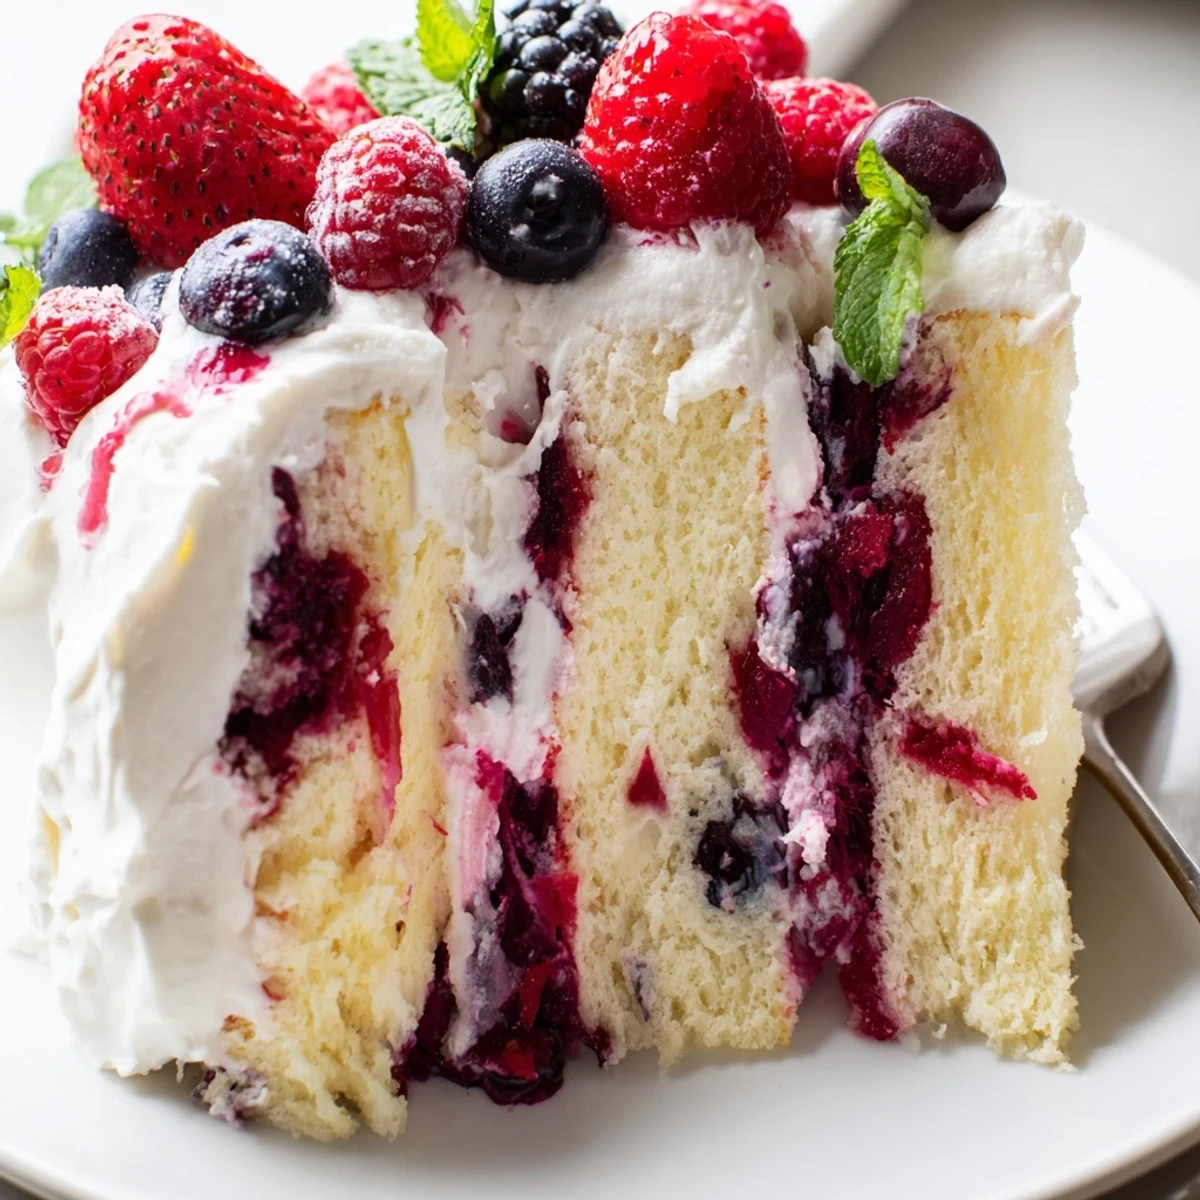
Save This delightful vanilla cake transforms into a sensational summer dessert when infused with a luscious mixed berry sauce. The technique of poking holes in the warm cake allows the sweet, tangy berry mixture to seep throughout, creating moist, flavorful layers in every bite. After chilling to let the flavors meld, the cake is crowned with freshly whipped cream and scattered with vibrant fresh berries. This make-ahead treat is ideal for warm weather entertaining, potlucks, and outdoor gatherings. The combination of tender cake, fruit-infused pockets, and light cream topping creates a perfectly balanced dessert that showcases the best of summer's berry harvest.
The kitchen was already eighty degrees when I decided baking a cake was a brilliant idea. My friend Sarah was coming over for what we called "porch sunset hour" and I wanted something that tasted like July evenings. I had this memory of my mom making poke cakes for potlucks, how she'd poke holes with such purpose, like she was leaving secret messages in the cake. That afternoon, the berries were so ripe they stained my fingertips just washing them.
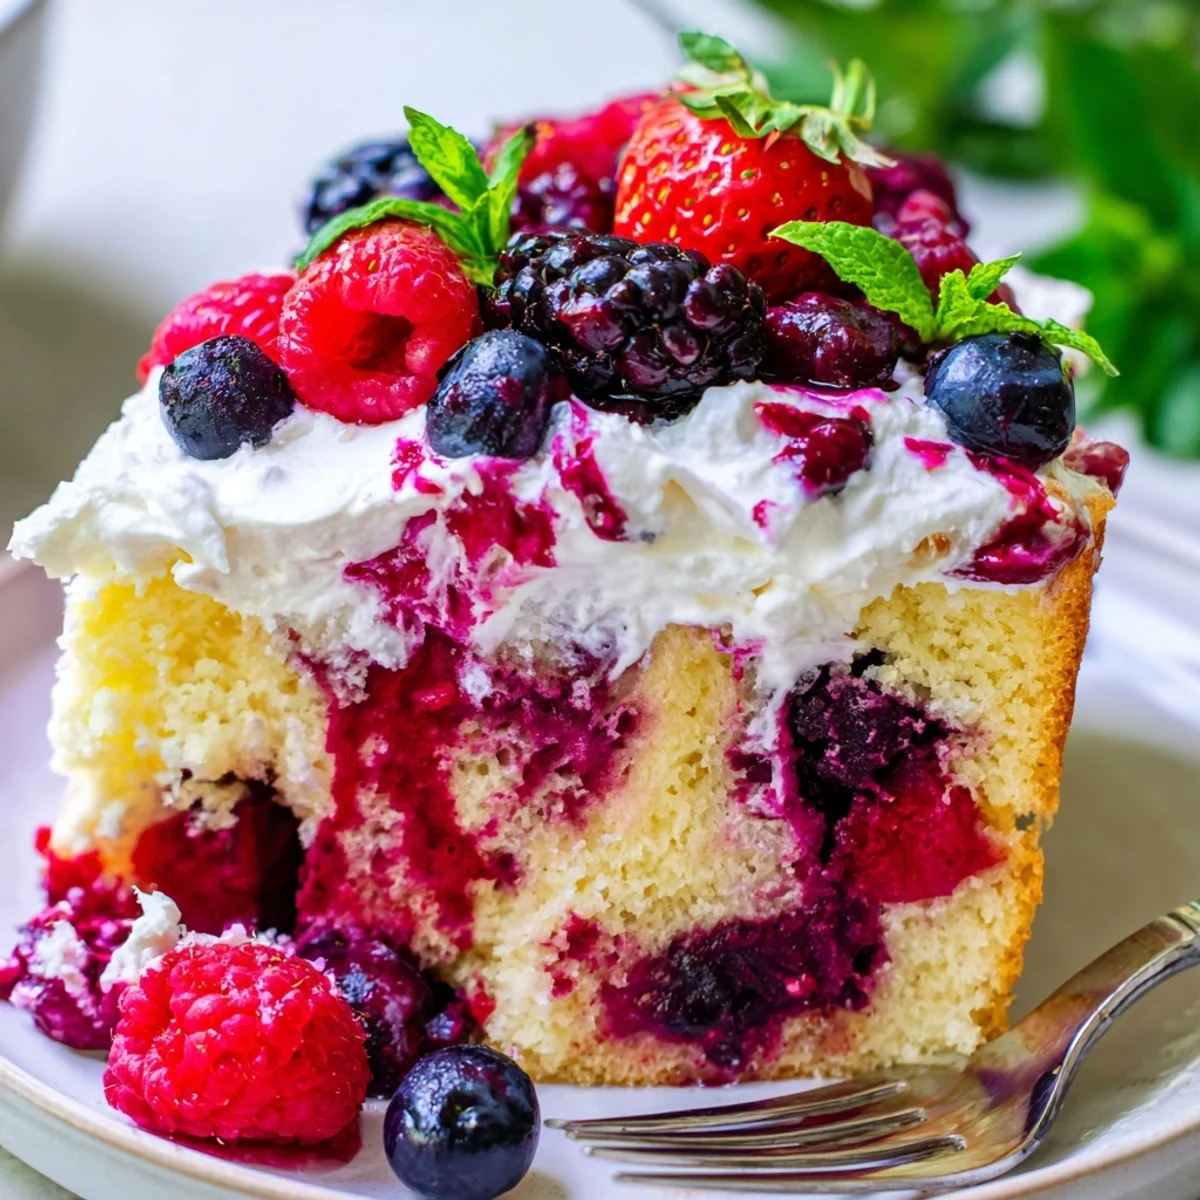
Sarah showed up right as I was poking holes in the warm cake, wooden spoon in hand, and immediately grabbed another spoon to help. We stood there at the counter, both of us poking away like we were performing surgery, laughing at how satisfying it felt. The purple syrup was already starting to seep into the holes, creating these gorgeous dark rivers through the pale vanilla cake. That cake sat on her porch all evening while we talked, and every time someone walked by, they'd ask what we were eating that smelled so incredible.
Ingredients
- 1 box vanilla or white cake mix: Sometimes store bought is exactly what summer needs, plus use whatever eggs, oil, and water the box calls for
- 2 cups mixed summer berries: Whatever looks best at the market, but I've found the combo of strawberries, blueberries, raspberries, and blackberries gives you that perfect sweet tart balance
- 1/2 cup granulated sugar: This tempers the berries natural acidity without making it cloying
- 1/2 cup water: Creates the syrup base that will work its magic into those holes
- 2 tbsp lemon juice: Brightens everything and keeps the berry flavor from becoming one note
- 2 tbsp cornstarch: The thickening agent that transforms juice into something that clings to the cake
- 2 cups heavy whipping cream: Don't even think about using whipped topping, real cream is what makes this feel special
- 1/4 cup powdered sugar: Just enough sweetness to stabilize the cream without making it taste like frosting
- 1 tsp vanilla extract: Pure vanilla, never imitation, this is the flavor foundation
- 1 cup fresh mixed berries: These go on top so they should be your prettiest ones
Instructions
- Bake your canvas:
- Prepare the cake mix exactly as the box directs and bake it in a 9x13 inch pan, then let it cool for about fifteen minutes so it's warm but not hot
- Create the wells:
- Take the handle end of a wooden spoon and poke holes all over the cake, spacing them about an inch apart in a pretty even pattern
- Make the magic syrup:
- Combine your berries, sugar, water, and lemon juice in a saucepan over medium heat and let it come to a gentle simmer while you whisk the cornstarch into two tablespoons of cold water
- Thicken it up:
- Stir that cornstarch mixture into the bubbling berries and cook for another two or three minutes until it thickens noticeably, almost like a thin jam
- The seeding decision:
- Push the sauce through a fine mesh sieve if you want it perfectly smooth, but I sometimes skip this because the little seeds remind everyone this is made with real fruit
- Pour and absorb:
- Pour that warm berry syrup slowly over your poked cake, making sure it gets into all those holes you made
- The patience phase:
- Let everything cool completely then refrigerate for at least an hour, though honestly two is better because the flavors really deepen
- Make the cloud:
- Whip your heavy cream with the powdered sugar and vanilla until it holds stiff peaks that don't droop when you lift the beaters
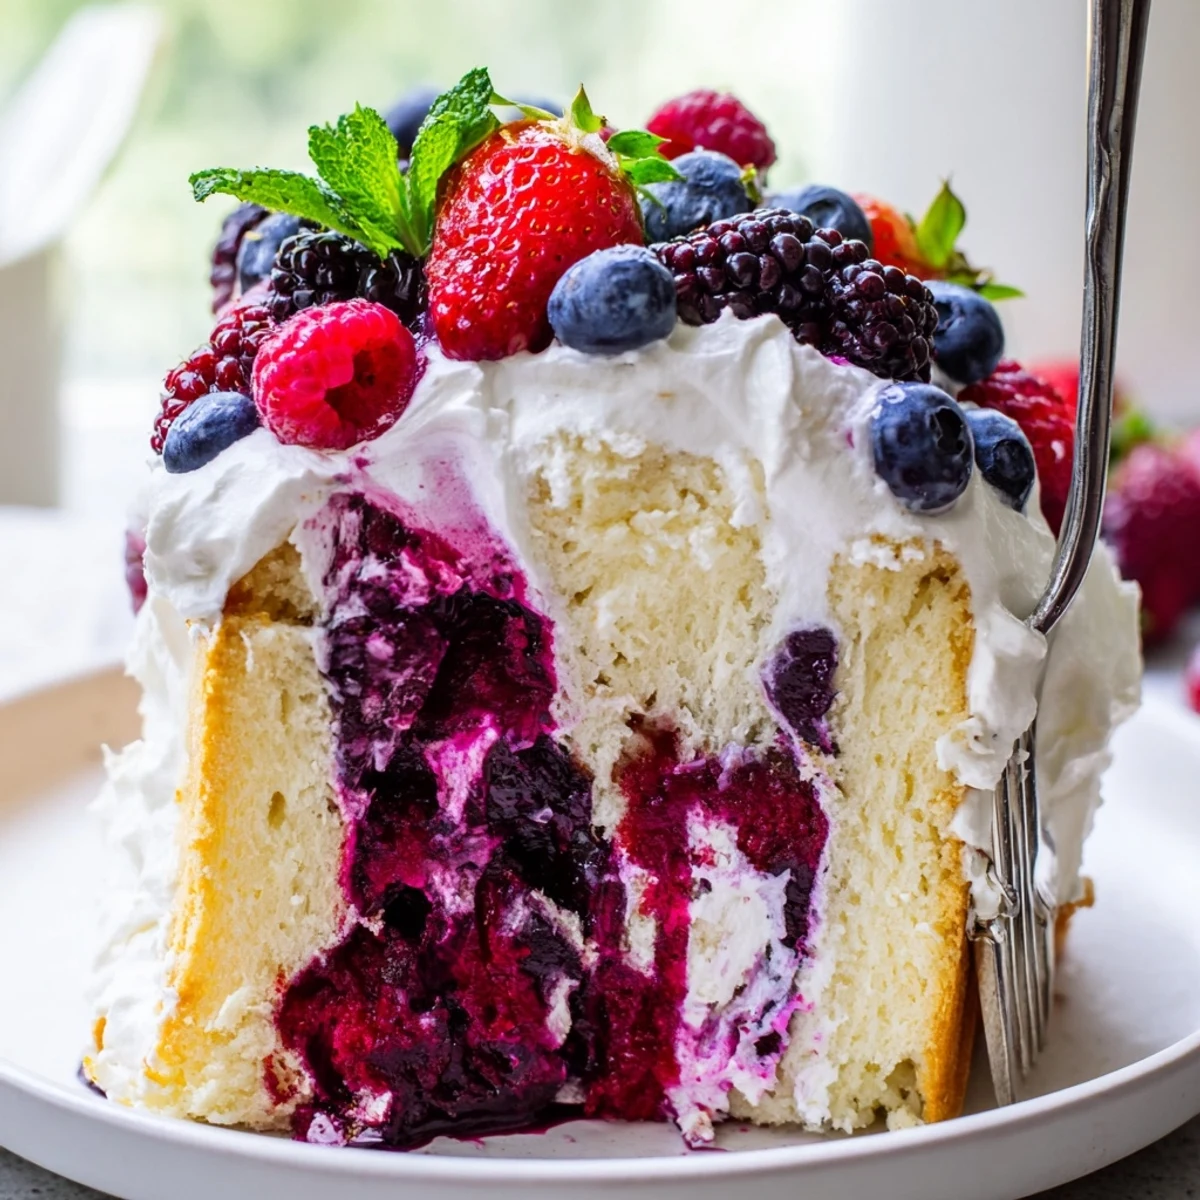
- Finish it beautifully:
- Spread that whipped cream over the chilled cake in an even layer and scatter your fresh berries on top, maybe some mint if you're feeling fancy
 Save
Save My brother in law still talks about the 4th of July when I brought this to a barbecue and he literally went back for fourths. There's something about the contrast of that tart berry layer against the sweet cream that makes people's eyes light up. It's become my go to for "I need to bring something but it's too hot to turn on the oven for long" situations.
Making It Ahead
You can absolutely bake and soak the cake a day ahead, just keep it covered in the fridge and add the whipped cream shortly before serving. I've learned that the cream starts to weep after about six hours, so timing matters. The soaked cake actually gets better overnight, like the flavors have a sleepover and become best friends.
Berry Substitutions
Frozen berries work completely fine here, and honestly, in winter they're often sweeter than the sad fresh ones at the grocery store. Just toss them in frozen, no need to thaw. I've made this with only strawberries, only blueberries, and even peaches when stone fruit was having a moment.
Serving Suggestions
This cake is happiest when served slightly chilled, not refrigerator cold but cool enough that the cream holds its shape in the summer heat. Cut it with a sharp knife dipped in hot water and wipe the blade between slices for those picture perfect squares.
- Serve with sparkling wine or chilled lemonade for the ultimate summer vibe
- If you're transporting it, bring the whipped cream in a separate bowl and spread it on site
- The leftovers the next morning, if there are any, are unexpectedly fantastic with coffee
 Save
Save There's something deeply satisfying about poking holes in a perfectly good cake, like you're giving permission for imperfection. Every time I make this, I think about how the best summer memories often start with someone saying "I have an idea."
Frequently Asked Recipe Questions
- → How far in advance can I make this berry poke cake?
-
You can prepare this dessert up to 24 hours ahead. The cake actually benefits from resting overnight, allowing the berry sauce to fully penetrate and flavors to intensify. Add the fresh berry garnish just before serving for the best presentation.
- → Can I use frozen berries instead of fresh?
-
Absolutely! Frozen berries work wonderfully in the sauce and actually release more liquid, creating a richer infused layer. No need to thaw them first—simply add them directly to the saucepan. For the garnish, fresh berries provide better texture and appearance.
- → What's the purpose of poking holes in the cake?
-
The holes create channels throughout the cake, allowing the warm berry sauce to seep deep into the layers rather than just sitting on top. This technique ensures every bite is moist and evenly flavored with the sweet berry mixture, transforming an ordinary cake into an extraordinary dessert.
- → How long should I refrigerate the cake before adding whipped cream?
-
Refrigerate for at least 1 hour after pouring the berry sauce, but 2-3 hours is ideal. This chilling time allows the sauce to set and the cake to firm up slightly, making it easier to spread the whipped cream evenly without pulling up the tender crumb.
- → Can I make this cake gluten-free?
-
Yes! Simply substitute the vanilla cake mix with a gluten-free cake mix blend. Most major brands offer reliable options that produce excellent results. Ensure your other ingredients, particularly the cornstarch, are certified gluten-free as well.
- → What other fruits work well in this poke cake?
-
While summer berries are classic, you can adapt this method with stone fruits like peaches or cherries, tropical fruits like mango or pineapple, or even apple cider in autumn. The key is creating a thickened sauce that will infuse the cake with flavor without making it soggy.