 Save
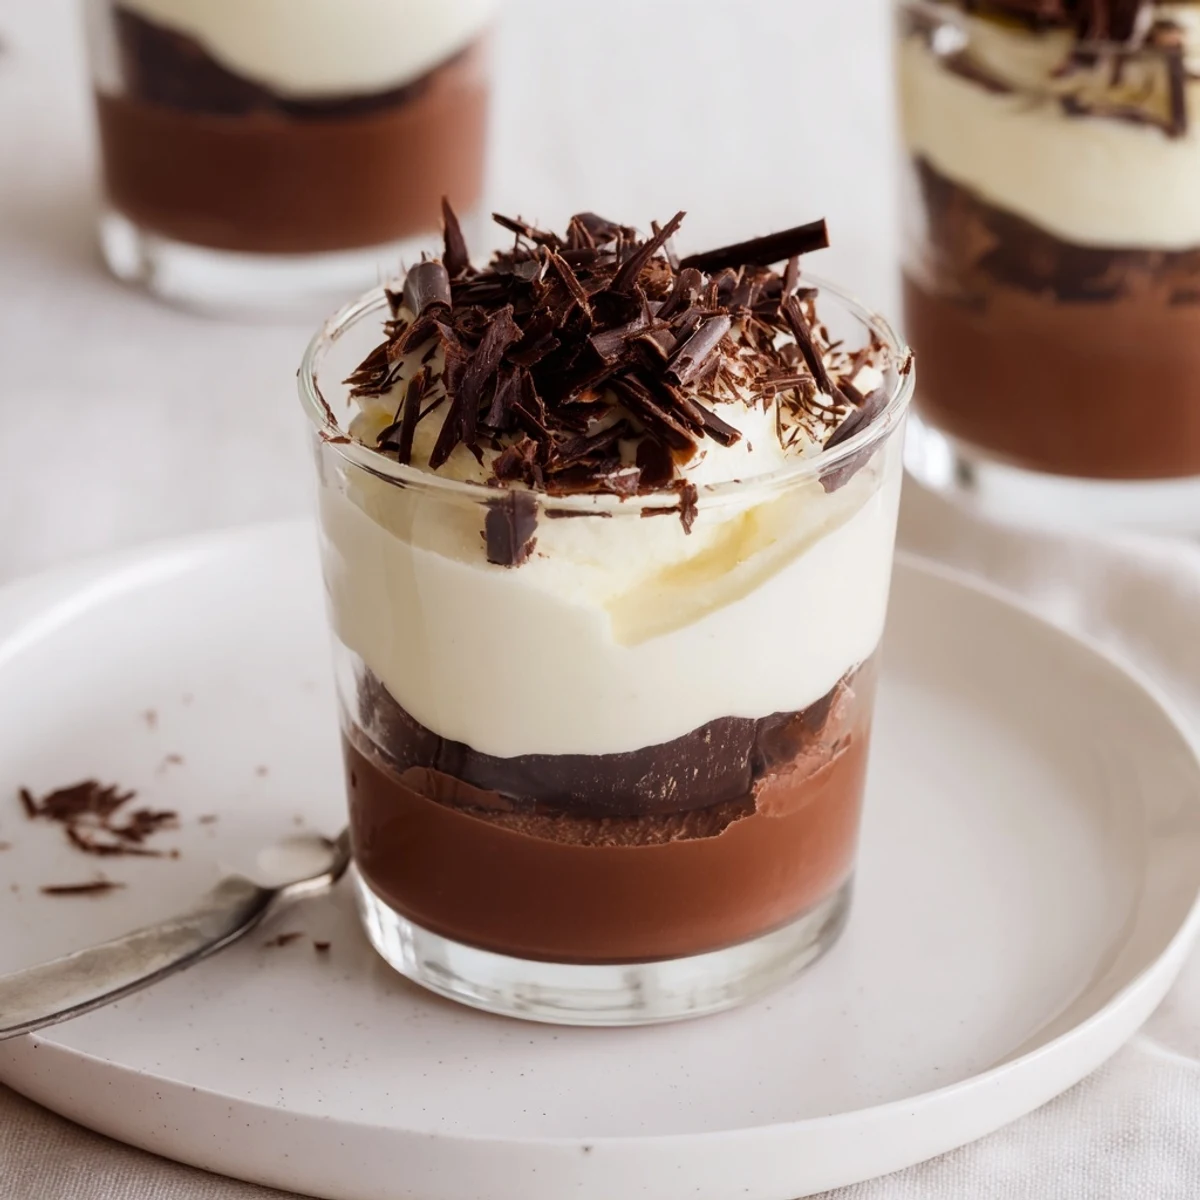
Save Triple chocolate mousse cups layer dark, milk and white mousses in small glasses for a rich, elegant finish. Each component is made by folding melted chocolate into a yolk-and-sugar base, then incorporating softly whipped cream to achieve an airy, silky texture. Assemble by spooning or piping layers, chill until set, and garnish with shaved chocolate or a dusting of cocoa. Brief freezing between layers speeds setting; a splash of coffee liqueur enhances depth.
Sometimes the most enjoyable desserts start with the simple sound of chocolate clinking against a chopping board while the kitchen fills with the quiet anticipation of what's to come. Triple Chocolate Mousse Cups became a playful project one rainy Saturday, when I decided to see if I could actually tell the difference between good chocolate and the cheap stuff I'd been using. I ended up with a counter splattered in cream and an array of mismatched serving glasses—so much for presentation, but the flavors spoke for themselves. The satisfaction of seeing those three distinct layers set perfectly was worth every smudge on my favorite apron.
There was this one family dinner when I made these mousse cups for six, nervously peeking into the fridge every ten minutes to check if each layer had set as it should. My nephew pressed his nose to the glass door, tracking the chilling progress and whispering, Should we just eat them now? That moment became an inside joke—Triple Chocolate Patience Test. It was all hands on spoons once the cups finally passed.
Ingredients
- Dark chocolate (100 g, minimum 60% cocoa): Gives the base layer real depth with just enough bitterness to anchor the dessert—don’t skimp, and let it cool before folding.
- Large egg yolks (3 total, 1 for each mousse): They create a luscious, almost custard-like foundation; make sure eggs are room temperature for best results.
- Sugar (1 ½ tbsp per mousse, 4 ½ tbsp total): Dissolving it fully into the yolks brings silkiness to each mousse without grittiness.
- Heavy cream (100 ml per mousse, 300 ml total): Whipping it to soft peaks is the secret to those truly feather-light layers—don’t over-whip or your mousse will turn dense.
- Milk chocolate (100 g): Adds a creamy sweetness to the center; temper it slowly so it stays smooth.
- White chocolate (100 g): The crowning layer, sweet and mellow—use a fine microplane to chop so it melts without seizing.
- Shaved chocolate or cocoa powder, for garnish: Even a handful of rough shavings lends a finished look, but I don’t always bother if I’m tucking these away for myself.
Instructions
- Melt and mix the chocolate layers:
- Start with the darkest chocolate and melt it gently—avoid any moisture sneaking in or it’ll seize, trust me. Let it cool to just warm before adding to your whipped egg yolks and sugar mixture, then fold in the softly whipped cream until no streaks remain.
- Layer and chill:
- Spoon the dark mousse into six small glasses, smoothing the tops. Slide them into the fridge while you repeat the process with the milk and then the white chocolate, gently spooning each new mousse over the last to keep the lines clean.
- Finish and serve:
- Once all three layers are nestled in each cup, give them a final chill for at least an hour. Sprinkle generously with shaved chocolate or dust lightly with cocoa just before serving, letting everyone marvel at the stripes before diving in.
 Save
Save One evening I brought these mousse cups to a potluck, and someone gasped when they caught sight of those neat, chocolatey bands—then they asked for seconds before even finishing the first. In that moment, it felt like more than dessert; it sparked laughter and a playful debate over which layer reigned supreme.
Letting the Layers Set Perfectly
After a few messy attempts, I found that slipping the cups into the freezer between layers sped things up, but I always set a timer to avoid icy mousses. Just a short chill firms each layer enough to hold its shape for the next pour, which is key for getting those distinct lines. Patience (or a timer) is the best kitchen assistant for this job.
Working with Different Chocolates
Each type of chocolate melts a bit differently: dark often goes smoothly, but white chocolate is famous for being stubborn—keep the heat low and stir constantly until it’s glossy and fluid. I’ve learned to prep and weigh everything before starting, since chocolate can turn from satiny to grainy in seconds if left unattended.
Making It Your Own—Flavor Twists and More
Tinkering with flavor is half the fun: add a splash of espresso or orange liqueur to the dark mousse for a little grownup flair, or scatter crunchy cocoa nibs between layers for surprise bites. Sometimes I swap shavings for fresh berries if I’m feeling fancy, which makes them look even more like they came from a boutique bakery.
- A small offset spatula helps spread layers without disturbing the one below.
- Don’t hesitate to double the recipe; these keep beautifully chilled overnight.
- Keep everything as dry as possible—just a bit of water can ruin your chocolate.
 Save
Save Triple Chocolate Mousse Cups are just the thing to cap off a cozy meal or treat yourself to on any old Tuesday. I promise, the effort is well worth those first creamy, chilled spoonfuls—enjoy every decadent layer.
Frequently Asked Recipe Questions
- → How do I prevent the chocolate from seizing when melting?
-
Melt slowly over a bain-marie or in short microwave bursts, stirring frequently. Avoid any water contact with the chocolate, and remove from heat as soon as it’s smooth to prevent graininess.
- → Can I substitute the egg yolks for a safer alternative?
-
For egg-free options, use a stable mousse base such as mascarpone folded with whipped cream or a whipped ganache set with gelatin or agar, taking care to maintain a light texture.
- → What’s the best way to get clean layers in the cups?
-
Chill each layer in the refrigerator or briefly in the freezer until set before adding the next. Spoon or pipe gently down the side of the glass to avoid disturbing the layer beneath.
- → How long should the cups chill before serving?
-
Chill for at least one hour to fully set the mousses; for firmer texture, refrigerate longer. If you used brief freezing between layers, a final 30–60 minutes in the fridge is enough before serving.
- → Which chocolate percentages work best for each layer?
-
Use high-quality dark chocolate around 60% cocoa for depth, standard milk chocolate for the middle layer, and creamy white chocolate for brightness. Balance flavors based on sweetness preference.
- → Any tips for garnishing and serving?
-
Top with shaved chocolate, cocoa powder, or a few chocolate curls for contrast. Serve chilled in clear glasses to showcase the layers and keep plates and tools cold to preserve texture.