 Save
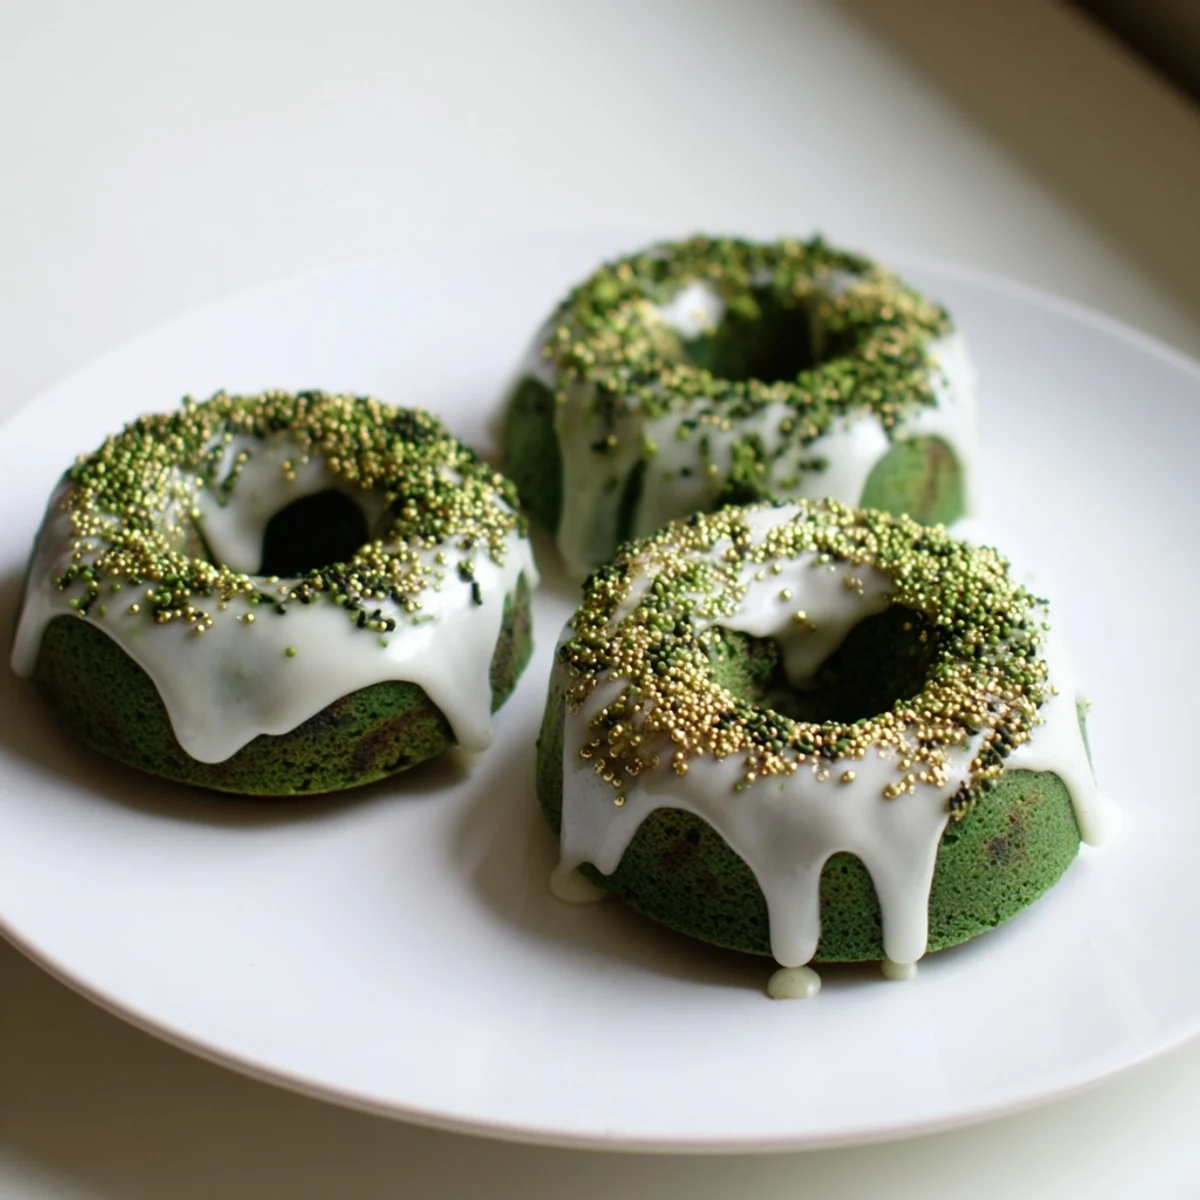
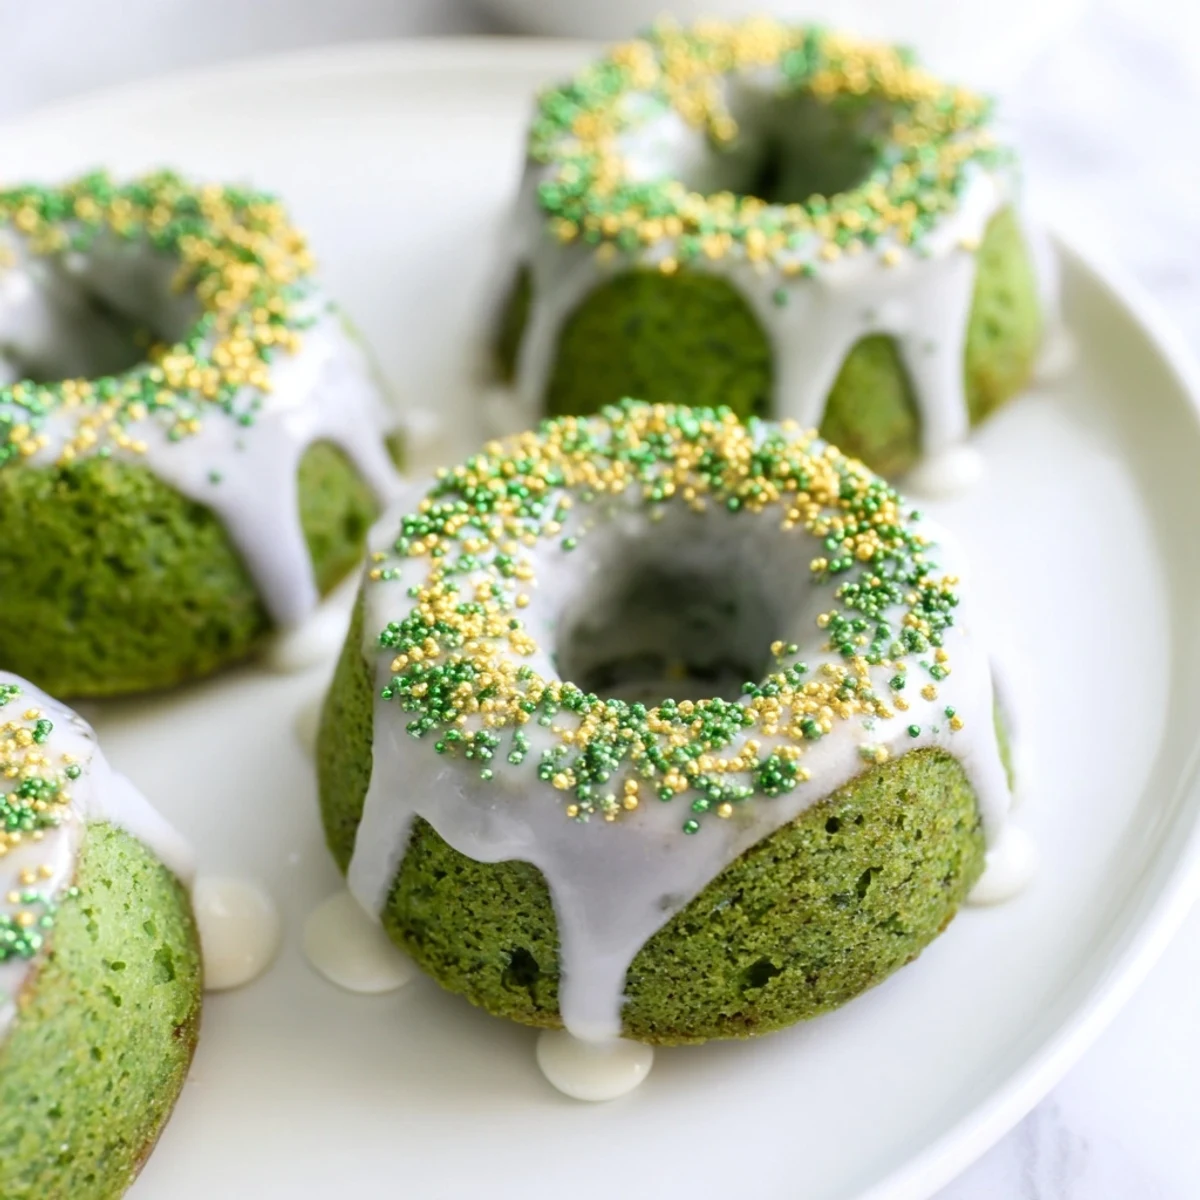
Save These charming green velvet mini bundt cakes combine the classic red velvet texture with festive St. Patricks Day flair. The batter features unsweetened cocoa powder for subtle chocolate depth, while buttermilk and vinegar ensure the signature moist, tender crumb. Gel food coloring creates that vibrant emerald hue that makes these treats perfect for March celebrations. Each cake bakes in just 20 minutes and emerges with a velvety texture that pairs beautifully with the sweet vanilla glaze. The glaze drapes beautifully over the ridges, and green and gold sprinkles add the perfect festive finishing touch. Make these for your St. Patricks Day gathering, or enjoy them anytime you want a fun, colorful dessert that tastes as good as it looks.
There was something almost rebellious about baking these vivid green cakes when gray winter still had our neighborhood in its grip. My kitchen felt like the only place celebrating anything, and honestly, that was exactly the point.
My sister walked in while I was carefully spooning batter into the pan and immediately demanded to know what occasion Id invented this time. We ended up eating three warm ones standing right there at the counter, laughing about how half the fun was just seeing something so cheerful on a plate.
Ingredients
- All-purpose flour: The foundation that gives these cakes their tender, velvety crumb structure
- Unsweetened cocoa powder: Just enough to deepen the flavor without announcing itself
- Baking soda: Essential for the lift that makes these light rather than dense
- Salt: A pinch that balances sweetness and wakes up all the flavors
- Unsalted butter: Room temperature butter creates the perfect canvas for incorporating air
- Granulated sugar: Sweetens and tenderizes while creating that lovely golden crust
- Large eggs: Bring structure and richness when at room temperature
- Buttermilk: The secret ingredient for moisture and a subtle tang
- Vanilla extract: Rounds everything out with warm, familiar comfort
- White vinegar: Reacts with buttermilk and baking soda for extra fluffiness
- Green gel food coloring: Gel delivers vibrant color without thinning the batter like liquid can
- Powdered sugar: Creates the silky, pourable glaze that dresses everything up
- Milk: Adjust the amount to reach your perfect glaze consistency
- Sprinkles: Because some days just call for edible confetti
Instructions
- Get your oven ready:
- Preheat to 350°F and thoroughly grease your mini bundt pan with butter or nonstick spray
- Whisk the dry team:
- In a medium bowl, combine flour, cocoa powder, baking soda, and salt until well blended
- Cream butter and sugar:
- Beat softened butter and sugar in a large bowl for about 3 minutes until light and fluffy
- Bring in the eggs:
- Add eggs one at a time, mixing well after each addition
- Mix the liquids together:
- Combine buttermilk, vanilla, vinegar, and green food coloring in a small bowl
- Combine everything:
- Add half the dry ingredients to butter mixture, then buttermilk mixture, then remaining dry ingredients
- Fill the pans:
- Spoon batter evenly into prepared mini bundt pans, filling each about two thirds full
- Bake until perfect:
- Bake for 18 to 22 minutes until a toothpick inserted comes out clean
- Cool with patience:
- Let cakes rest in pan for 10 minutes, then carefully invert onto wire rack to cool completely
- Make the glaze:
- Whisk powdered sugar, milk, and vanilla until smooth and pourable
- Finish with flair:
- Drizzle glaze over cooled cakes and add sprinkles while slightly wet
 Save
Save These became my go to whenever someone needed a little pick me up. Something about that cheerful green color and the promise of sweet vanilla glaze just works, turning ordinary Tuesdays into tiny celebrations.
Making Ahead
The cakes actually taste better the next day once flavors have had time to deepen and settle. Wrap them tightly once cooled and they will wait patiently for you until youre ready to glaze and serve.
Color Secrets
I learned that the green color bakes slightly darker than it appears in raw batter, so aim for one shade brighter than your target. The vinegar also helps maintain the colors vibrancy during baking, a happy chemistry accident I discovered by accident.
Serving Ideas
These are perfect for potlucks, office celebrations, or just because its March and you want to feel festive. The individual portions make people feel special without the commitment of a full slice.
- Plate them on a simple white cake stand for maximum color impact
- Pair with coffee or tea for a sophisticated afternoon treat
- Package in clear bags tied with green ribbon for gifts
 Save
Save May your kitchen be filled with laughter and your St Patricks Day be sweeter for these little green cakes. They are proof that celebration comes in all sizes.
Frequently Asked Recipe Questions
- → What gives green velvet cake its color?
-
Green gel food coloring creates the vibrant emerald hue. Gel coloring works better than liquid drops as it provides more intense color without adding excess moisture to the batter. Start with half a tablespoon and add more until you reach your desired shade.
- → Can I make these mini bundt cakes ahead of time?
-
Yes! The unfrosted cakes stay fresh for up to 2 days when stored in an airtight container at room temperature. Add the glaze and sprinkles shortly before serving for the best texture and appearance. You can also freeze the unfrosted cakes for up to 3 months.
- → Why is there vinegar in the batter?
-
White vinegar reacts with the buttermilk and baking soda to create extra lift and tenderness. This chemical reaction is essential for achieving that classic velvety texture while also helping the green color develop more vibrantly during baking.
- → What can I use if I don't have buttermilk?
-
Simply combine half a cup of regular milk with one teaspoon of lemon juice or white vinegar. Let the mixture sit for five minutes until it thickens slightly and curdles. This homemade substitute works perfectly in the batter.
- → How do I know when the mini bundt cakes are done?
-
Insert a toothpick into the center of one cake—the top portion, avoiding the dense center tube. If it comes out clean or with just a few moist crumbs, they're ready. The edges should also pull away slightly from the pan, and the cakes should spring back when gently pressed.
- → Can I add Irish cream to the glaze?
-
Absolutely! Replace one tablespoon of milk with Irish cream liqueur for an adult twist. This adds subtle warmth and complements the chocolate undertones beautifully. Just be sure to label accordingly if serving at gatherings with children.