 Save
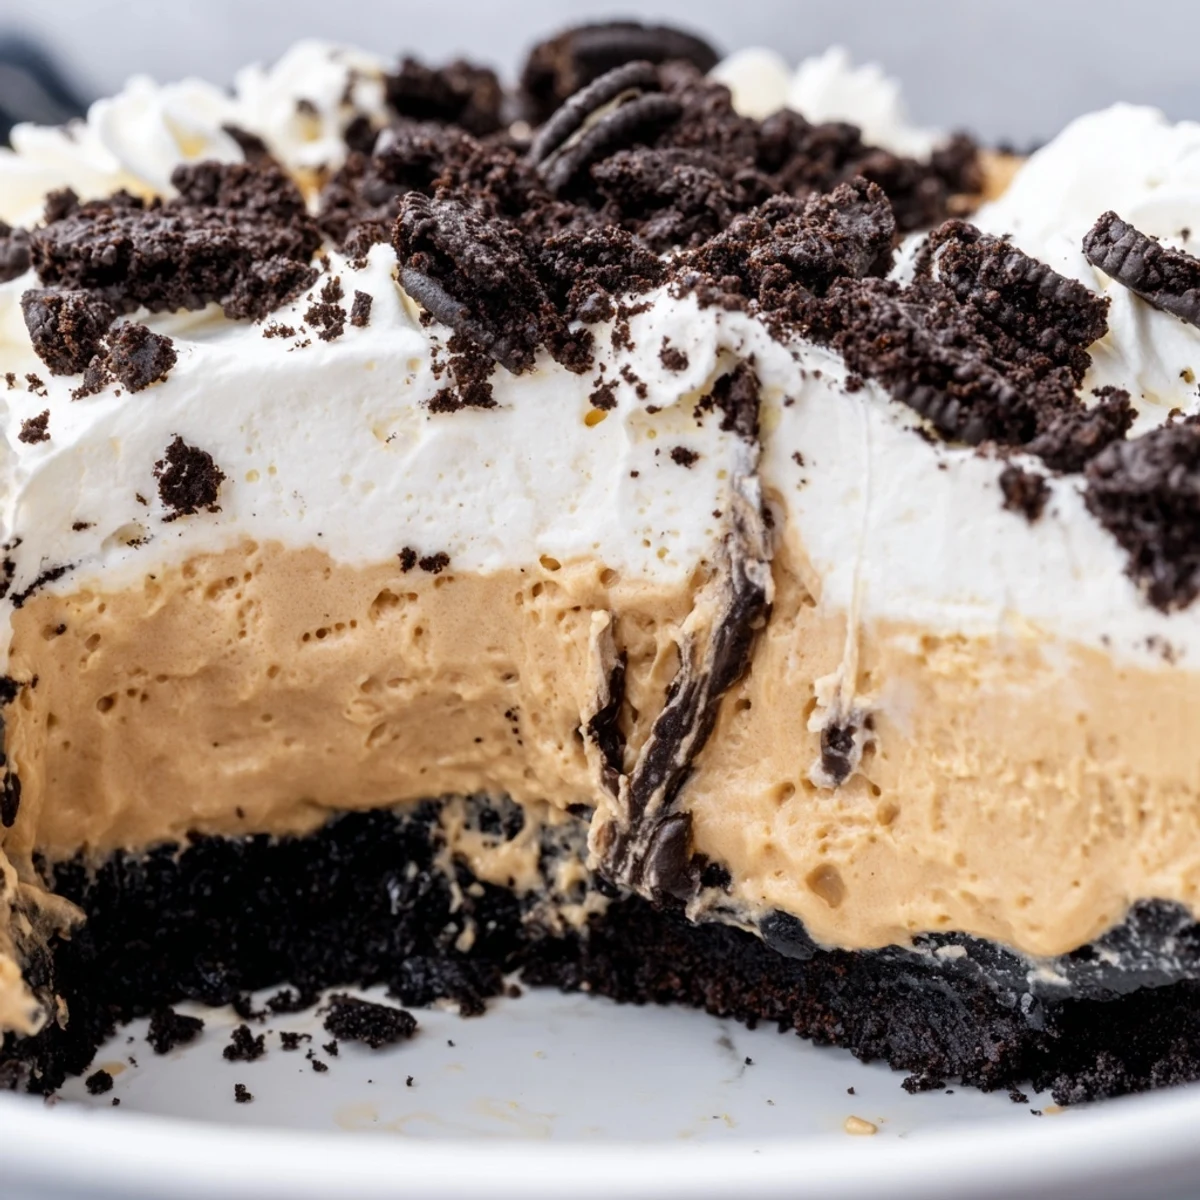
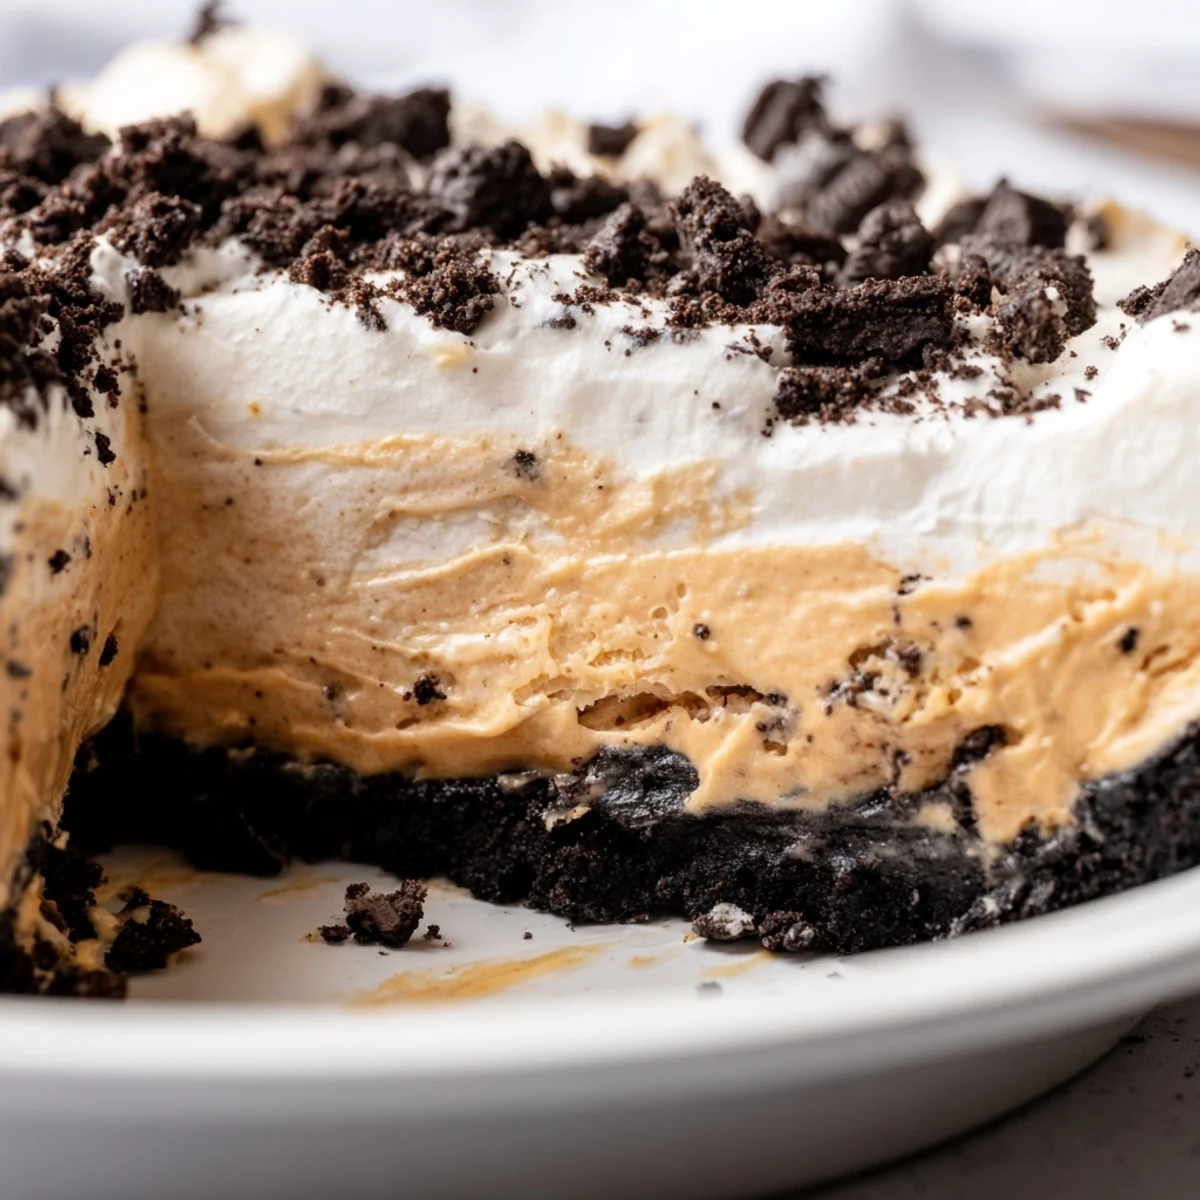
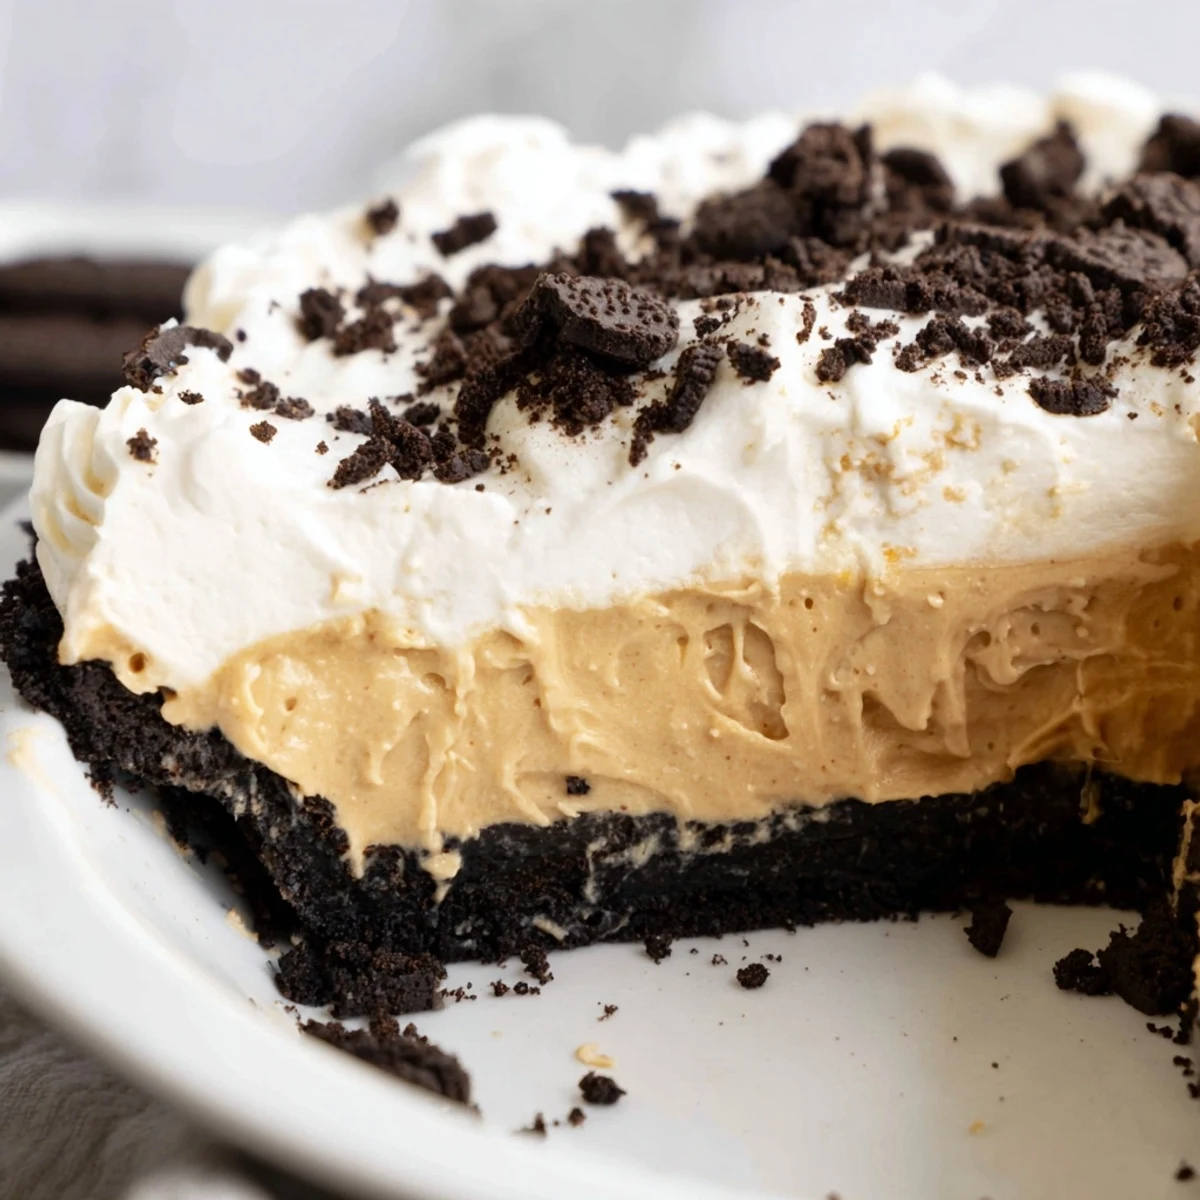
Save This indulgent dessert combines the classic flavors of peanut butter and chocolate cookies in one stunning presentation. A buttery Oreo crust forms the foundation for a silky peanut butter filling made with cream cheese and whipped cream. The entire creation is crowned with sweetened whipped cream and crushed cookie pieces for added texture and visual appeal. Perfect for gatherings, this make-ahead dessert requires minimal active preparation time and yields eight generous servings. The contrast between the crunchy crust, smooth filling, and light whipped topping creates an irresistible layered experience that satisfies any sweet tooth.
The first time I made this pie, my roommate walked into the kitchen and literally stopped mid sentence. That chocolate peanut butter combination has a way of demanding attention. I'd been experimenting with no bake desserts all summer, but something about this particular creation made people keep coming back for just one more sliver.
I brought this to a Fourth of July potluck last year, and my friend's husband—who claims he doesn't even like sweets—went back for three pieces. Watching people's faces light up when they take that first bite has become my favorite part of making it. Now it's the most requested dessert at every family gathering.
Ingredients
- 24 Oreo cookies: These form the foundation of your crust, and keeping the cream filling intact helps bind everything together when mixed with butter
- 5 tbsp (70 g) unsalted butter, melted: The fat here transforms the cookie crumbs into a solid, pressable crust that holds up beautifully when sliced
- 1 cup (250 g) creamy peanut butter: Room temperature peanut butter blends much more smoothly with the cream cheese, preventing any lumpy texture
- 8 oz (225 g) cream cheese, softened: This adds structure and a slight tang that cuts through the rich peanut butter
- 1 cup (120 g) powdered sugar: Powdered sugar dissolves completely into the filling, giving you that perfectly smooth, creamy consistency
- 1 cup (240 ml) heavy whipping cream: Whipping this separately and folding it in creates the mousse like texture that makes this pie so incredibly light
- 1 cup (240 ml) heavy whipping cream for topping: Fresh whipped cream on top balances the dense filling with airy sweetness
- 2 tbsp (15 g) powdered sugar: Just enough sweetness to make the topping irresistible without overpowering the pie
- 4 Oreo cookies, coarsely crushed: That extra cookie crunch on top makes each bite feel special
Instructions
- Build that chocolate crust:
- Preheat your oven to 350°F (175°C) and crush those Oreos with their filling in a food processor until you've got fine, even crumbs. Mix them with melted butter until everything is evenly coated, then press the mixture firmly into the bottom and up the sides of a 9 inch pie dish. Bake for 10 minutes to set it, then let it cool completely before adding any filling.
- Whip up the peanut butter filling:
- Beat the softened cream cheese and peanut butter together until they're completely smooth and no lumps remain. Add in your powdered sugar and mix until fully incorporated, then in a separate bowl whip that cup of heavy cream until you've got stiff peaks. Gently fold the whipped cream into your peanut butter mixture, being careful not to overmix and lose all that air you just whipped in.
- Assemble and chill the pie:
- Spread your lightened peanut butter filling evenly over that completely cooled Oreo crust, making sure to get it into all the edges. Pop it in the refrigerator for at least 2 hours—overnight is even better—to let it fully set up. This chilling time is crucial for clean slices.
- Add the final whipped cream layer:
- Whip your remaining cup of heavy cream with the powdered sugar until stiff peaks form, then spread or pipe it generously over your thoroughly chilled pie. Crush up those last four Oreos and sprinkle them over the top for that perfect finishing touch.
- Slice and serve:
- Clean slices happen when you dip your knife in hot water between cuts, and this pie needs to stay cold until serving time for the best texture. Store any leftovers covered in the refrigerator.
 Save
Save My grandmother asked for the recipe after tasting it at Thanksgiving, and now she makes it for her bridge club every month. There's something about sharing food that sparks conversation and creates these little moments of connection.
Making It Ahead
This pie actually tastes better after sitting overnight, giving the flavors time to meld together. I often make it the day before a gathering and just add the whipped cream topping an hour before serving to keep it looking fresh.
Getting The Perfect Crush
If you don't have a food processor, putting Oreos in a sealed bag and rolling over them with a heavy can or rolling pin works beautifully. I learned this trick in my first apartment when I was still building my kitchen collection.
Customizing Your Creation
Sometimes I swap in crunchy peanut butter for extra texture, and other times I drizzle melted chocolate over the whipped cream for that extra wow factor. Golden Oreos in the crust create a lovely blondie base that changes the whole character.
- A chocolate ganache drizzle takes this over the top beautifully
- Mixing chopped peanut butter cups into the filling adds惊喜 in every bite
- A pinch of sea salt on top enhances all the flavors
 Save
Save There's nothing quite like watching someone take that first bite and seeing their eyes widen with pure delight. This pie has become my go to for celebrations, and I hope it brings just as much joy to your table.
Frequently Asked Recipe Questions
- → How long should I chill the pie before serving?
-
Refrigerate the assembled pie for at least 2 hours to allow the filling to set completely. For best results, chill overnight to achieve the firmest texture.
- → Can I make this dessert ahead of time?
-
Yes, this dessert is perfect for preparing in advance. You can make the crust and filling up to 2 days before serving. Add the whipped cream topping and cookie garnish within 24 hours of serving for optimal freshness.
- → What type of peanut butter works best?
-
Creamy peanut butter creates the smoothest texture for the filling. However, you can substitute crunchy peanut butter if you prefer added nutty texture and small peanut pieces throughout.
- → How should I store leftovers?
-
Cover the pie dish tightly with plastic wrap or transfer slices to an airtight container. Store in the refrigerator for up to 5 days. The texture remains excellent, though the garnish may soften slightly over time.
- → Can I freeze this peanut butter pie?
-
Yes, freeze the pie without the whipped cream topping. Wrap the crust and filling tightly in plastic and foil for up to 2 months. Thaw overnight in the refrigerator before adding fresh whipped cream and serving.
- → What variations can I try?
-
Experiment with different cookie varieties for the crust, such as chocolate sandwich cookies or vanilla wafers. Add a chocolate drizzle, sprinkle with sea salt, or layer chopped peanut butter cups between the filling and topping.