 Save
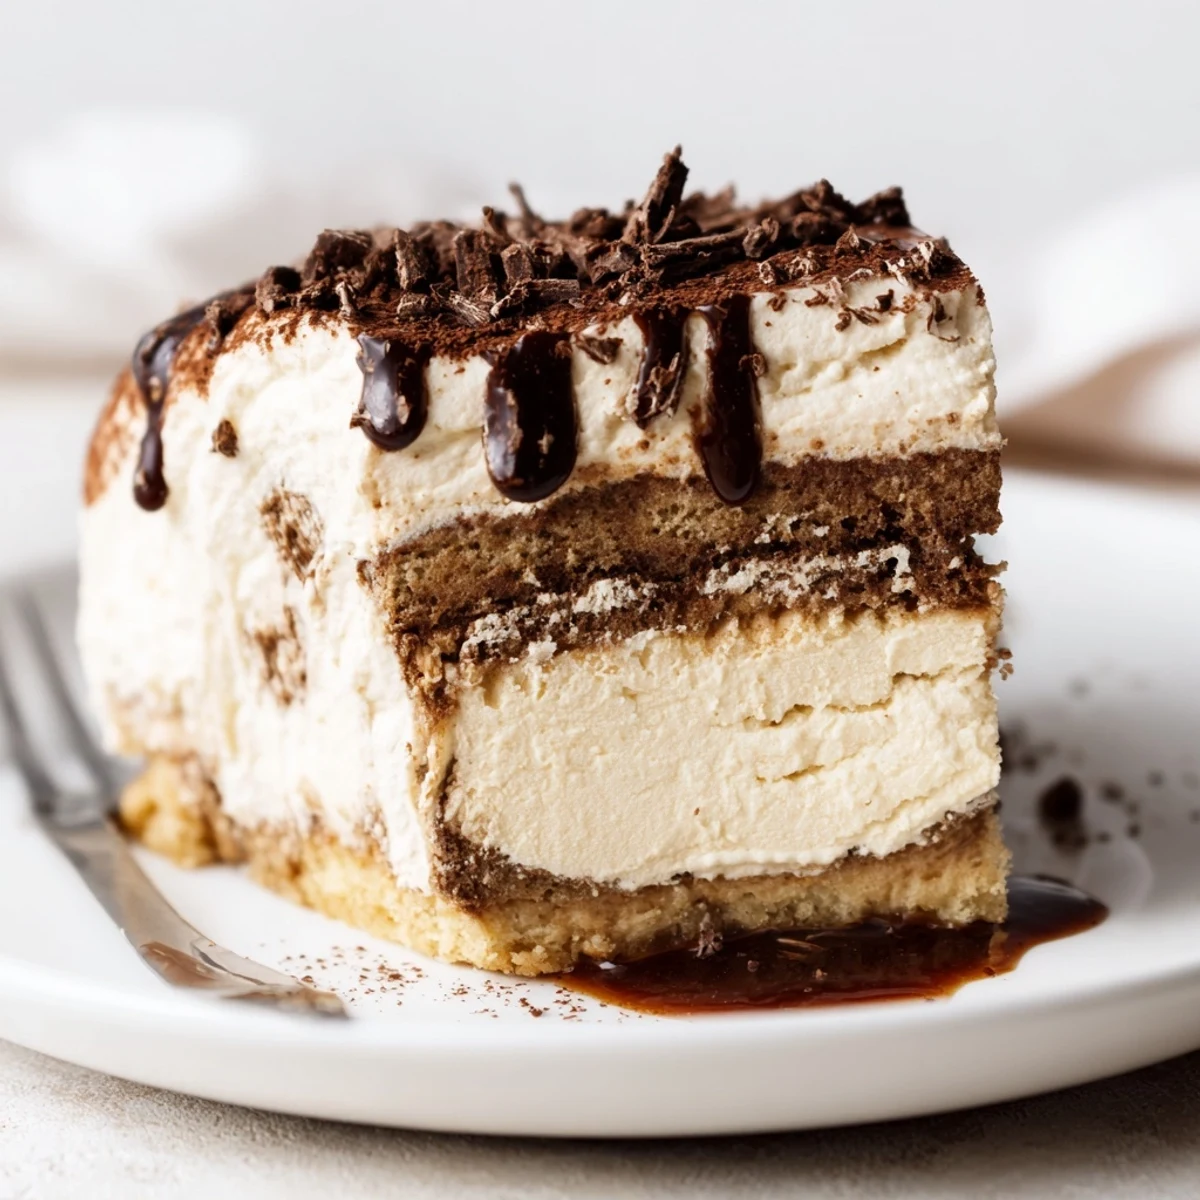
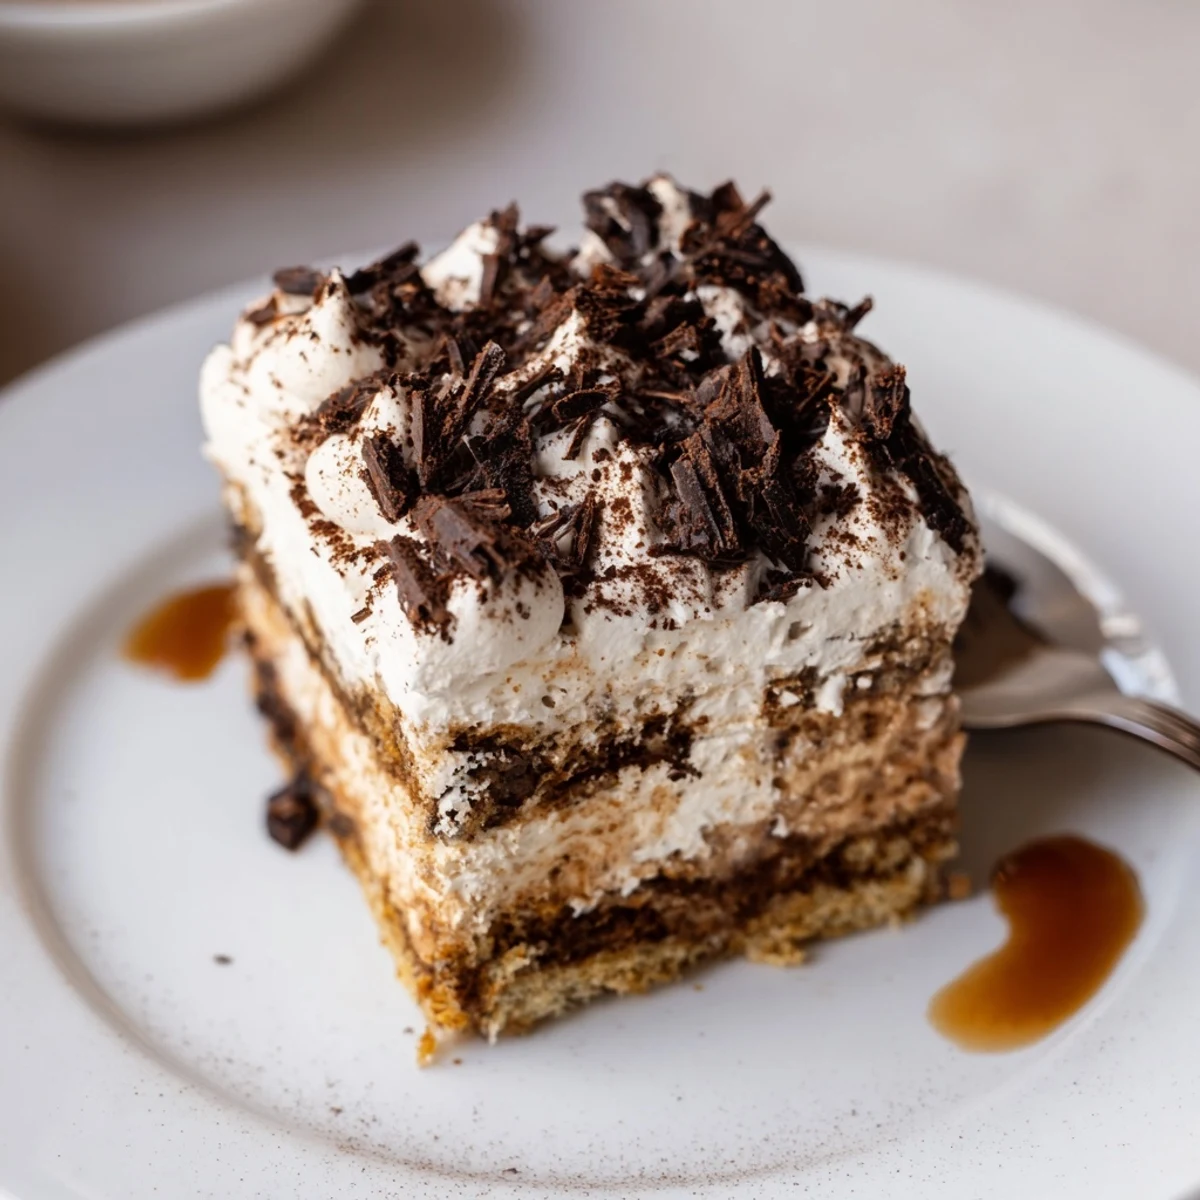
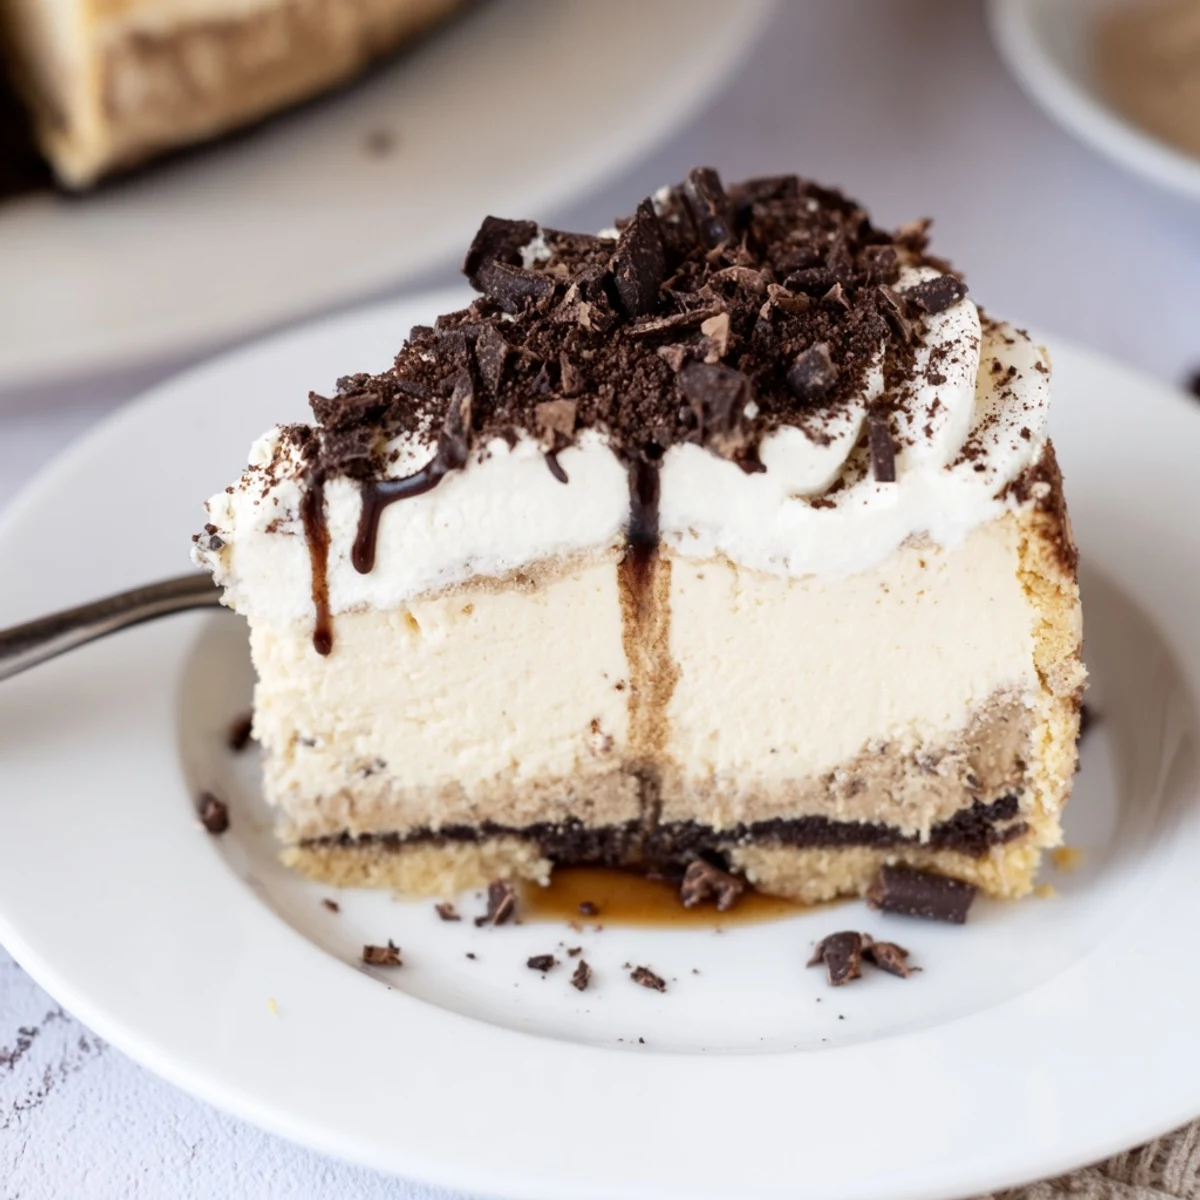
Save This tiramisu cheesecake blends cream cheese and mascarpone with bold espresso and eggs for a rich, silky filling. A butter-bound ladyfinger crust is brushed with a coffee soak to deepen the coffee notes. Bake in a water bath until just set, cool slowly, then refrigerate several hours for clean slices and a velvety mouthfeel.
The first waft of espresso mingling with mascarpone in my kitchen still makes me grin. It’s not just the promise of something rich—it’s that luxurious scent swirling with anticipation. Creating this tiramisu cheesecake always feels like orchestrating a tiny, delicious experiment. Sometimes the chandelier sparks up with sunlight just as the cocoa is dusted, and suddenly the whole moment slows down.
Last winter, I brought this cheesecake to a friend’s birthday brunch, balancing it nervously on my knees on the train. When I cracked open the box at their kitchen table, everyone instantly circled around, peppering me with questions about the coffee smell and the glossy, cocoa-dusted peaks.
Ingredients
- Ladyfinger biscuits (savoiardi): They give the crust an airy, toasty snap, and blitzing them in the food processor makes it effortlessly smooth and fine.
- Unsalted butter: Melting and mixing with the crumbs makes the base hold together, and I’ve learned to press it extra-firm for a perfect slice.
- Instant espresso powder: Added to the crust for real depth, not just scent—always dissolve it in the butter for even flavor.
- Cream cheese: Room temperature is key; otherwise, lumps haunt the cheesecake forever.
- Mascarpone cheese: This brings all the tiramisu charm; don’t swap it for anything else if you can help it.
- Granulated sugar: Not too much—just enough to balance the coffee notes.
- Large eggs: Add these one at a time so the batter stays smooth and airy.
- Strong brewed espresso: Let it cool before stirring in, or the filling will go runny.
- Vanilla extract: Pure extract deepens all the creamy notes and gives the cake warmth.
- All-purpose flour: Just a spoonful, to hold things together without making it dense.
- Salt: A single pinch brings all the flavors into sharp focus.
- Coffee liqueur: Optional, but if you want a grown-up twist, this adds a gentle boozy finish.
- Heavy cream: Whip this cold for maximum volume—it makes the finished topping stand tall.
- Powdered sugar: Sifts smoothly into the cream for sweetness and shine.
- Unsweetened cocoa powder: Sieve it lightly over the top for a classic bitter finish.
- Dark chocolate shavings: Scatter these right before serving for a finishing flourish and extra bite.
Instructions
- Prep the Oven & Pan:
- Warm up the oven to 160°C (325°F), and carefully line a 23 cm springform pan—this makes later release a breeze.
- Make the Crust:
- Whirl ladyfingers in a food processor until fine, then blend in melted butter and espresso powder so the crumbs glisten. Press them snugly into the pan’s base and bake for 10 minutes for a toasty, fragrant start.
- Mix the Coffee Soak:
- In a small bowl, stir hot espresso with sugar and coffee liqueur until everything dissolves; let it cool so the biscuit base won’t get soggy.
- Blend the Cheesecake Filling:
- In a big bowl, beat cream cheese, mascarpone, and sugar until silky and lump-free, then add eggs one at a time. Pour in espresso, vanilla, flour, and salt, mixing slowly so the filling stays light.
- Layer Coffee Soak:
- Brush or drizzle half the coffee soak over the cooled biscuit crust, letting it gently seep in without flooding.
- Bake the Cheesecake:
- Pour the creamy filling over the base, tap the pan for bubbles, and bake in a water bath for one hour. After turning off the oven, leave the door ajar and cool for another hour—this keeps the filling luscious and crack-free.
- Chill and Finish:
- Allow the cheesecake to cool completely at room temperature, then refrigerate it for at least 4 hours, though overnight is best—patience pays off!
- Whip and Decorate:
- Whip cold cream, powdered sugar, and vanilla to stiff peaks, then smooth over the chilled cheesecake. Dust with cocoa, scatter with chocolate shavings, and cut generous slices to serve.
 Save
Save There’s a glow in the room when someone takes the first bite and pauses—eyes widening just a little—before they grin. That pure, content hush always feels like the cheesecake’s greatest compliment.
The Secret to a Smooth, Crack-Free Cheesecake
Baking this in a water bath doesn’t just prevent cracks; it creates that luscious, creamy texture that melts slowly with each forkful. I always line the outside of my springform pan with foil, just to be sure no water sneaks in during the slow bake.
How to Make Your Coffee Flavors Pop
Don’t be shy with the espresso powder in the base or brewed espresso in the filling—both have to stand out over the creamy backdrop. Sometimes I even toss in an extra dash of espresso in the soak for a little boldness if I know coffee lovers are coming to the table.
Little Fixes and Flourishes
One time, I forgot the chocolate shavings and improvised with an extra sprinkle of cocoa and a few roasted coffee beans for crunch—it was a surprise hit. Sometimes I pipe the whipped cream in little decorative clouds around the edge, but smoothing it on with a spatula is just as lovely. If you ever want to add a boozy note, a drizzle of coffee liqueur before the whipped cream is irresistible.
- Slice with a hot, clean knife for perfect edges every time.
- Let the cheesecake come out of the fridge 20 minutes before serving for the creamiest bite.
- Keep leftovers chilled and tightly covered—they somehow taste even better the next day.
 Save
Save However you serve it, this tiramisu cheesecake quietly steals the show. It’s indulgence in every spoonful, and there’s always someone hoping there’ll be just one more slice.
Frequently Asked Recipe Questions
- → Can I omit the coffee liqueur?
-
Yes. Skip the liqueur and increase the hot espresso or add a splash of extra sugar to the coffee soak for similar depth without alcohol.
- → How do I prevent cracks on the surface?
-
Bake the cheesecake in a water bath and avoid overbaking; the center should still jiggle slightly when done. Let it cool slowly with the oven door ajar to reduce sudden temperature changes.
- → What’s the best way to get a silky texture?
-
Bring dairy to room temperature before mixing, beat until smooth but avoid overwhipping after adding eggs, and chill at least four hours or overnight to set the crumb and filling.
- → Can I swap ladyfingers for another biscuit?
-
Yes. Digestive biscuits or lightly spiced butter cookies work well; pulse to fine crumbs, mix with melted butter and espresso to match the intended crunch and flavor.
- → How can I tell when the center is done?
-
The edges should be set while the center still has a gentle wobble. It will firm up during the cooling and chilling stages, yielding a creamy but stable slice.
- → Any tips for the whipped topping?
-
Chill the bowl and whisk briefly beforehand, then whip heavy cream with powdered sugar and vanilla to stiff peaks. Smooth over the chilled cheesecake and dust with cocoa powder just before serving.