 Save
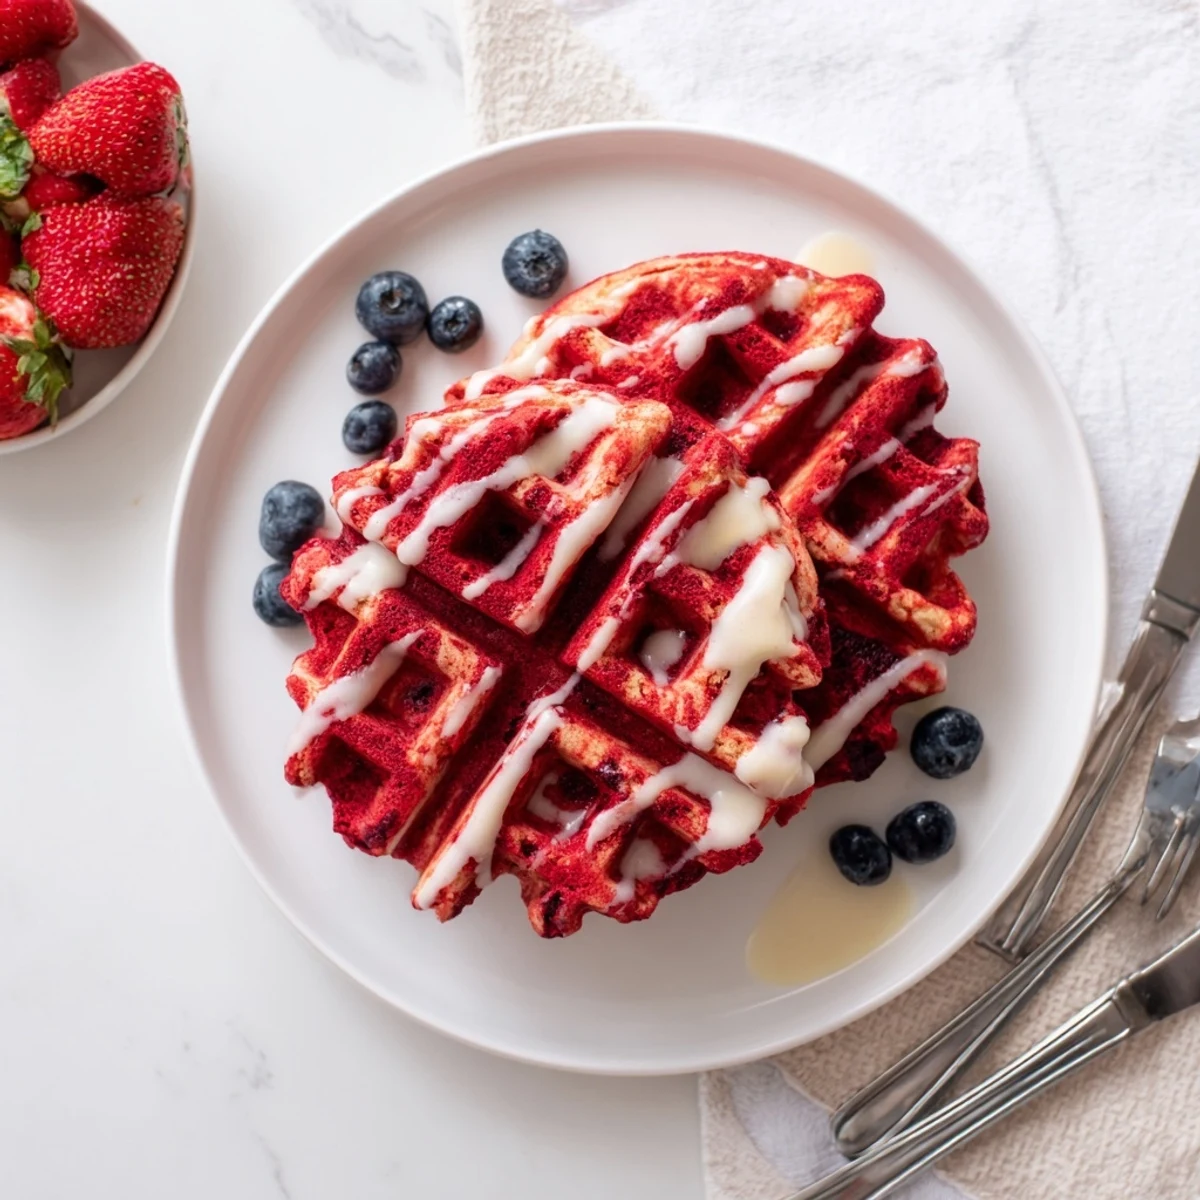
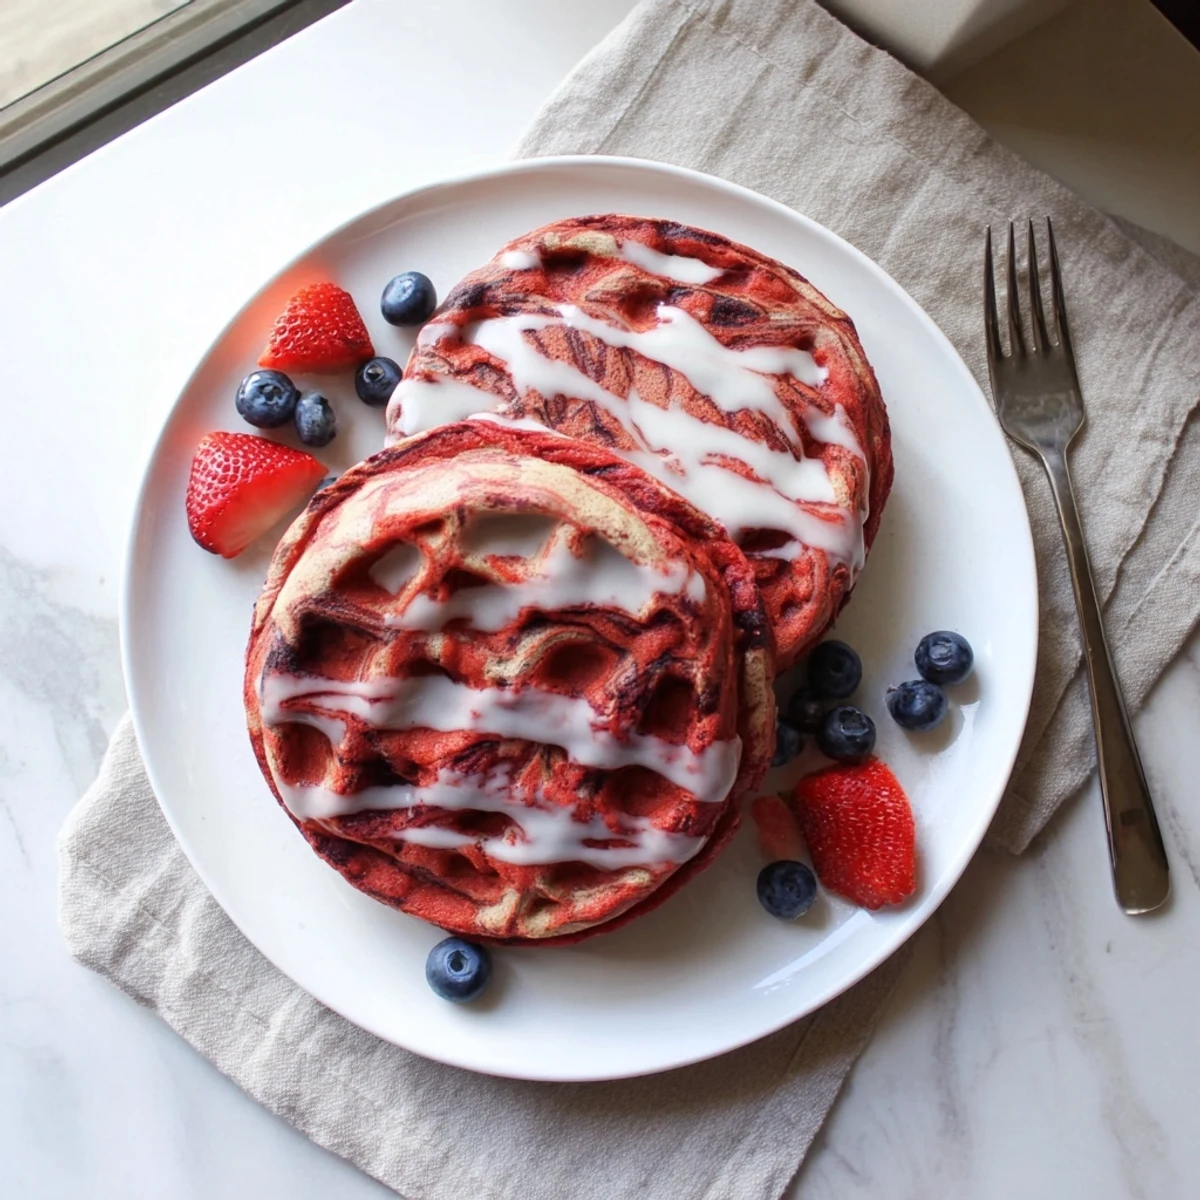
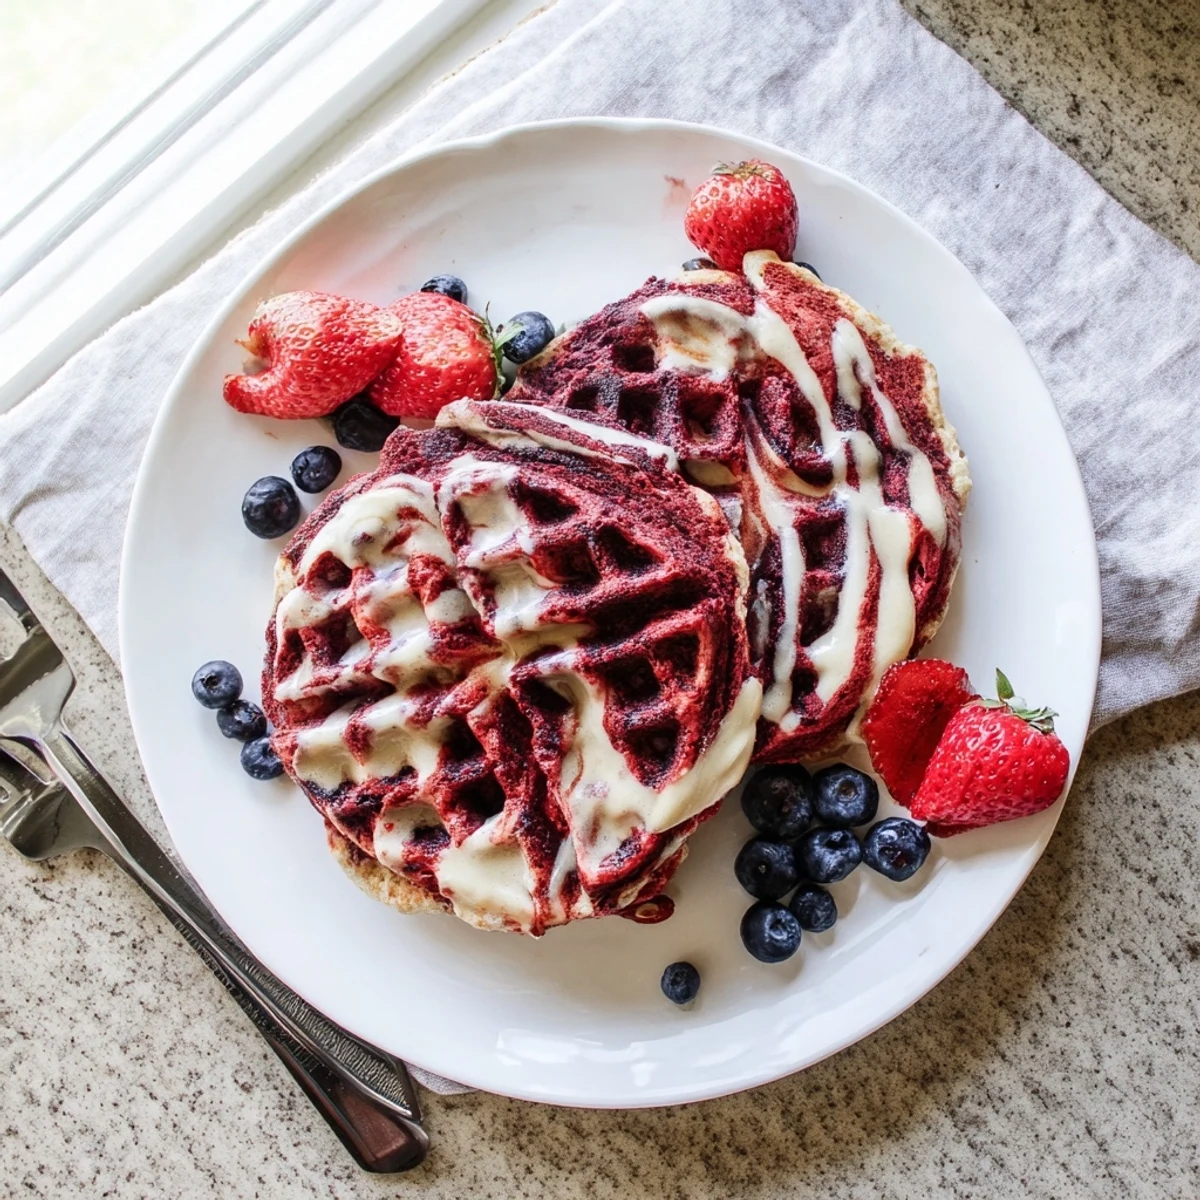
Save Transform your weekend breakfast with these stunning red velvet marble waffles that bring together the best of both worlds—rich cocoa-infused red velvet batter swirled alongside creamy vanilla. The technique is simple: prepare your waffle batter, divide it in two, tint one portion with red food coloring and cocoa powder, then create that gorgeous marble effect by alternating spoonfuls onto your hot waffle iron and gently swirling together.
Perfect for special occasions, holiday mornings, or when you want to elevate your brunch game, these waffles cook up crisp and golden in just 3-5 minutes. The buttermilk ensures tender results while the dual-color presentation makes them instantly Instagram-worthy. Top with cream cheese glaze, fresh berries, or keep it classic with maple syrup.
The morning sun hit my kitchen counter just right, and suddenly I remembered that half-bottle of red food coloring hiding in the back of the cupboard. My daughter had been begging for something special for weekend breakfast, and those plain waffles from last week just weren't going to cut it anymore. I poured the cocoa powder into one bowl, watched it turn that impossibly deep red, and something about the way the vanilla batter looked beside it made me grab a chopstick and start swirling. The first batch came out looking like edible art, and honestly, I've never seen breakfast disappear so fast.
Last Valentine's Day, I made these for a casual brunch with friends who swore they didn't like red velvet anything. Someone took a photo before even taking a bite, and within minutes, the entire stack was gone. Now whenever I mention waffle brunch, someone immediately asks if I'm bringing the red and white ones. The best part is watching people discover that little ribbon of vanilla cutting through the chocolate—their faces always light up like they've found a secret treasure.
Ingredients
- 2 cups all-purpose flour: The foundation that gives these waffles their structure and that perfect crisp exterior
- 2 tbsp granulated sugar: Just enough to enhance the vanilla and balance the cocoa without making them overly sweet
- 2 tsp baking powder and 1/2 tsp baking soda: This combination ensures your waffles rise properly and maintain their fluffiness
- 1/4 tsp salt: Essential for bringing out all the flavors and preventing that flat, cardboard taste
- 1 3/4 cups buttermilk: The secret to tender waffles with a subtle tang that complements both chocolate and vanilla
- 2 large eggs: Room temperature eggs blend better and help create that ideal waffle texture
- 4 tbsp unsalted butter, melted and slightly cooled: Butter adds richness, but let it cool so it doesn't scramble your eggs
- 1 tsp vanilla extract: Use the good stuff here since vanilla is one of the stars of the show
- 2 tbsp unsweetened cocoa powder: Dutch-processed cocoa gives a deeper, smoother chocolate flavor
- 1 tbsp red food coloring: Gel coloring works best for vibrant red without thinning your batter
Instructions
- Whisk the dry foundation:
- In a large bowl, combine flour, sugar, baking powder, baking soda, and salt until everything looks evenly distributed. I like to use a whisk to aerate the flour first—it makes a noticeable difference in the final texture.
- Blend the wet ingredients:
- In a separate bowl, whisk buttermilk, eggs, melted butter, and vanilla extract until completely smooth. Take your time here, because any lumps now will become pockets of plain batter later.
- Gentle folding matters:
- Pour the wet mixture into the dry ingredients and fold them together just until the flour disappears. Overmixing activates gluten too much, and suddenly your tender waffles are chewing like rubber.
- Create the batters:
- Divide your batter evenly between two bowls. Stir cocoa powder and red food coloring into one until it becomes that gorgeous deep red, leaving the other bowl plain and creamy.
- Heat things up:
- Preheat your waffle iron and give it a quick coating of oil or cooking spray. I learned the hard way that even nonstick irons need a little help with this swirled batter.
- The marble technique:
- Spoon alternating dollops of red velvet and vanilla batter onto the hot iron, then drag a chopstick through them once or twice. Don't overdo it—a little restraint gives you those beautiful distinct swirls.
- Cook to golden perfection:
- Close the lid and let them cook for 3 to 5 minutes until they're crisp and cooked through. The steam will slow down, and that gorgeous golden-brown color will tell you they're ready.
- Serve immediately:
- These are best right off the iron, while the outside is still crisp and the inside is fluffy. Top them however you like, but honestly, they're stunning on their own.
 Save
Save My mother-in-law stayed over last month and watched me make these, fascinated by the swirling process. She confessed she'd never made anything marbled before because it seemed intimidating, but by the third waffle, she was already planning all the flavor combinations she wanted to try. There's something about seeing that first waffle open up that makes you feel like you can handle anything in the kitchen.
Mastering the Marble
The trick is not overthinking the swirl pattern. I spent way too much time trying to create perfect spirals on my first attempt, and honestly, the simple back-and-forth motion looks more elegant. The iron does most of the work for you as it closes, creating those organic marble veins that make each waffle unique.
Topping Ideas That Work
A simple cream cheese glaze takes these over the top—just whisk together softened cream cheese, a splash of milk, and powdered sugar until it's pourable. Fresh berries add tartness that cuts through the richness, and if you really want to impress someone, a dollop of whipped cream on top never hurt anybody.
Make-Ahead Magic
These waffles freeze beautifully, which means you can have red velvet marble waffles on a Tuesday morning without any extra effort. Let them cool completely on a wire rack, then freeze them in a single layer before transferring to a freezer bag.
- Reheat frozen waffles in the toaster for that fresh-made crispness
- Pop them in a 350°F oven for 5 minutes if you're reheating a whole batch
- The microwave works in a pinch, but you'll lose that signature waffle crunch
 Save
Save There's something deeply satisfying about cutting into a marbled waffle and seeing that pattern revealed. These have become my go-to whenever I need to remind someone that breakfast can be a little bit magical.
Frequently Asked Recipe Questions
- → What makes red velvet marble waffles different from regular waffles?
-
Red velvet marble waffles combine cocoa powder and red food coloring in one portion of the batter while keeping the other portion vanilla. The two batters are swirled together on the waffle iron, creating a beautiful marbled pattern with dual flavors—chocolatey red velvet and classic vanilla in every bite.
- → How do I achieve the perfect marble effect?
-
Alternate dolloping spoonfuls of red velvet and vanilla batters onto the center of your preheated waffle iron. Use a chopstick, butter knife, or toothpick to gently swirl the two colors together just once or twice—don't overmix or you'll lose the marble pattern. Close the lid immediately and let the iron create the waffle shape.
- → Can I make the batter ahead of time?
-
Yes, you can prepare the batter the night before and store it in the refrigerator in separate covered bowls. However, the red velvet batter may darken slightly overnight due to the food coloring developing. Let the batter sit at room temperature for 15-20 minutes before cooking for the best results.
- → What toppings work best with red velvet marble waffles?
-
Cream cheese glaze is the classic pairing—just mix softened cream cheese with milk and powdered sugar until smooth. Fresh strawberries or raspberries complement the red color beautifully. Whipped cream, chocolate chips, or a dusting of cocoa powder also work wonderfully. Of course, pure maple syrup is always delicious.
- → Can I use natural food coloring instead of artificial red dye?
-
Yes! Beet juice or pomegranate juice can provide natural red coloring, though the result will be more subtle than gel or liquid food coloring. You may need 2-3 tablespoons of juice to achieve noticeable color. Keep in mind that natural colorings might produce a slightly berry-tinged flavor, which can actually complement the cocoa notes beautifully.
- → What can I substitute for buttermilk?
-
Greek yogurt thinned with a splash of milk works excellently as a buttermilk substitute. Alternatively, make your own buttermilk by adding 1 tablespoon of white vinegar or lemon juice to 1¾ cups of regular milk and letting it sit for 5-10 minutes until thickened and slightly curdled. Both options maintain the necessary acidity for tender waffles.